

"Magic Studio" by Canva
How to effectively utilize the "Magic Grab" AI tool.
Tutorial by Emma
06/21/2024
As highlighted in previous weekly tips,
when using a transparent header (a preferred choice from your dev leads),
it's crucial to ensure the logo is visible and stands out.
Working with CP logos can sometimes complicate things, especially when they feature a detailed graphic, a hard-to-find font, or are too low-res for some of our other standard tips and tricks to be effective.
Luckily, some of the new AI tools, or "Magic Studio" features from Canva,
can help with finding an aesthetically sound solution.

We will use the logo above for today's "Magic Grab" tool demonstration. For this particular site's design, I needed the logo's text to stand out on a transparent header, but turning the entire logo white was impractical due to its intricate details. Without recreating the text, I found a new solution, which I will show you below.
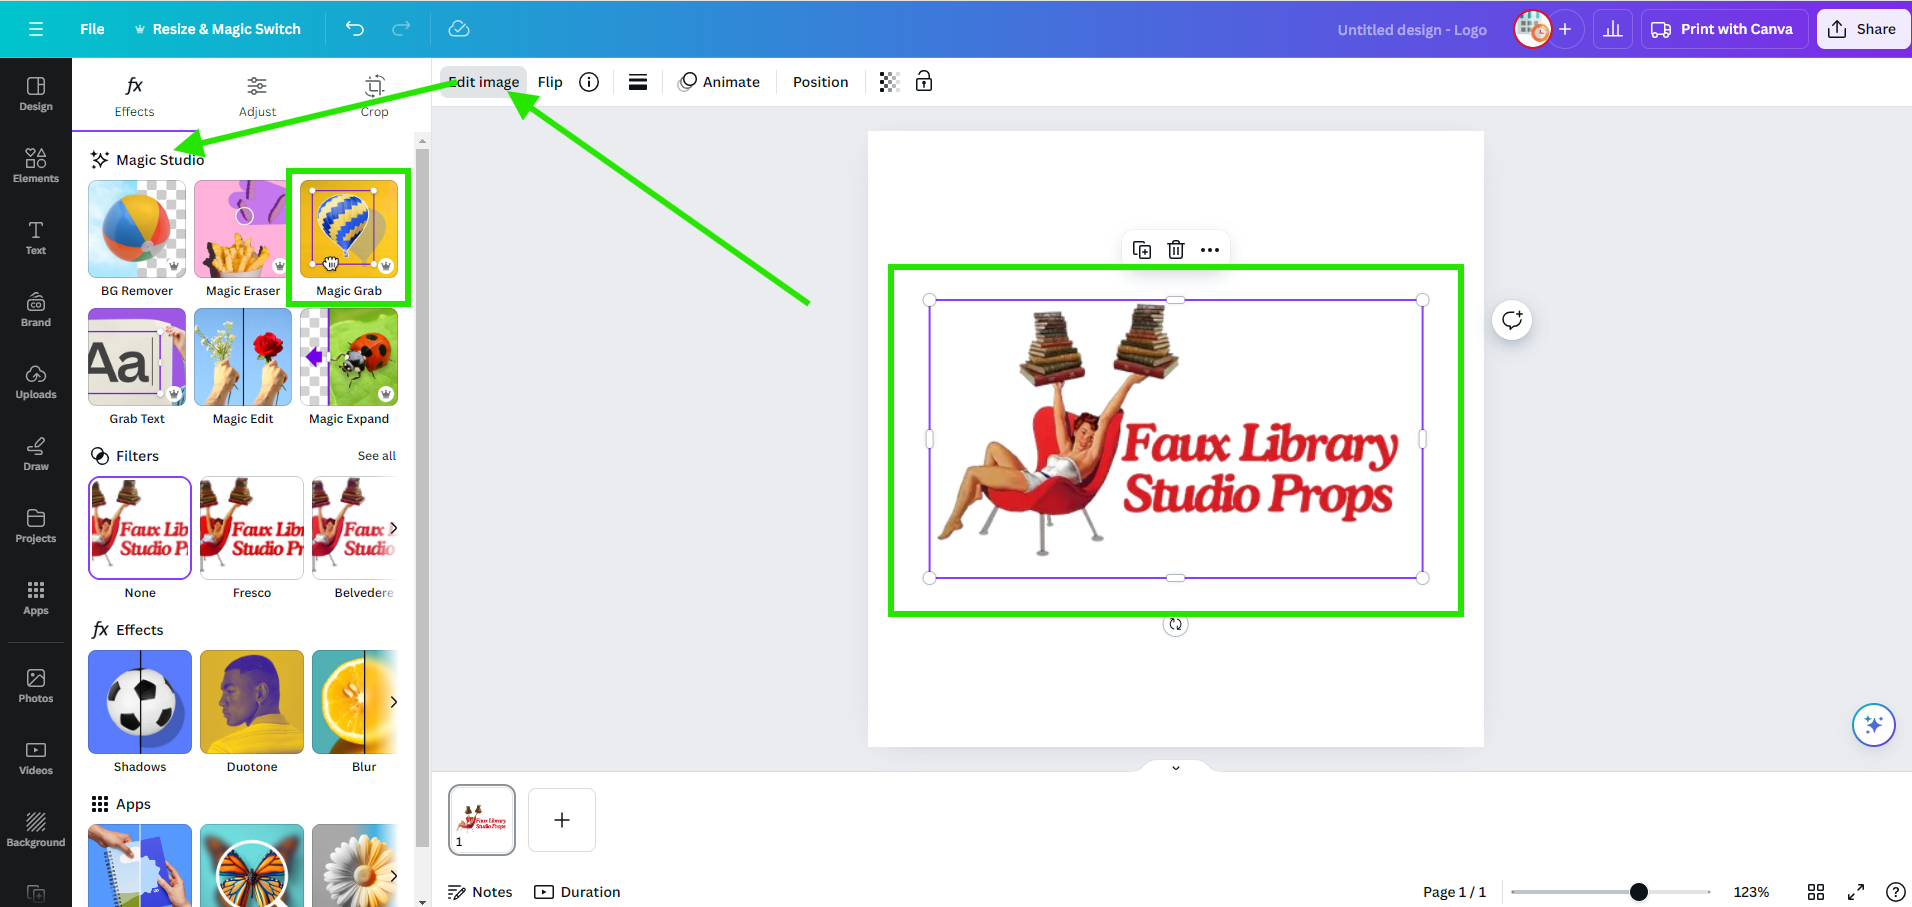
1. After opening your logo in Canva and selecting it, click "Edit Image" to access the toolbar on the left, where you'll find "Magic Studio" at the top. Today, we are using the "Magic Grab" tool, so go ahead and click on it to get started.
Note: These options are only available with compatible media and may sometimes be inaccessible due to factors like media quality and type.
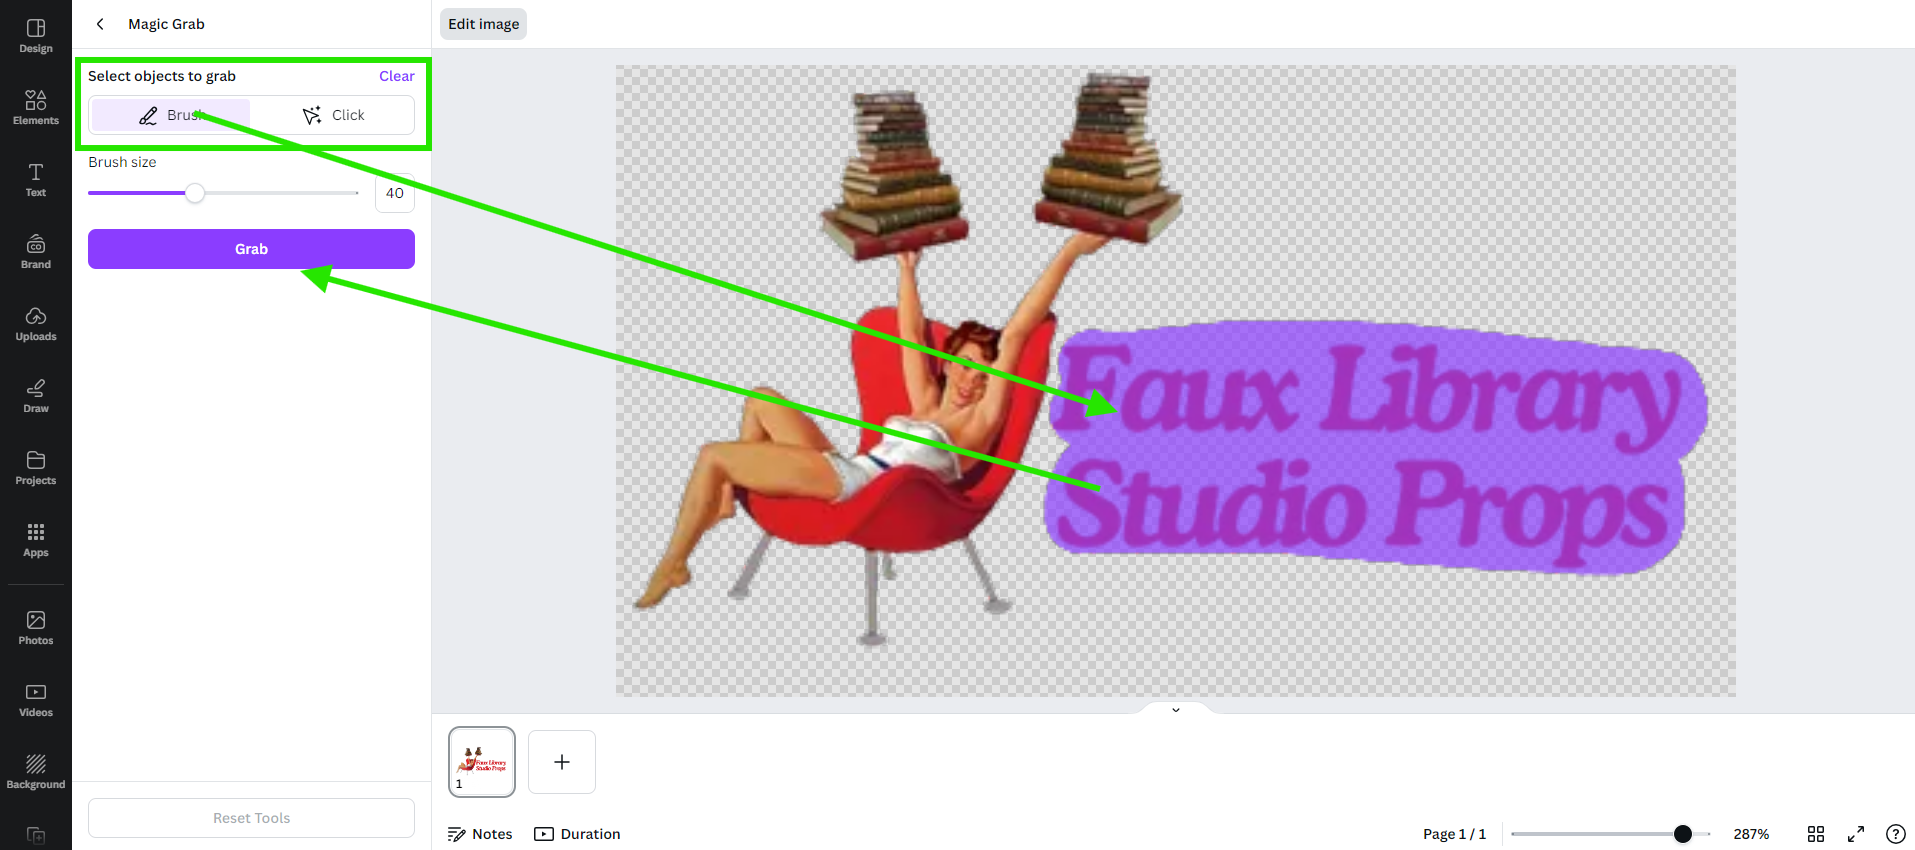
3. Begin by selecting either the "Brush" or "Click" tool to fully isolate the design element you wish to edit. The "Brush" tool allows for more precision when needed, but the "Click" tool produces cleaner results, so experiment with both to find what works best.
4. After you have ensured the desired area of the image is fully covered or selected, click "Grab." The result may take a little while to generate, and the result may come out looking a bit rough at first (see above). That's usually due to server issues on Canva's end, so don't lose hope! Note the purple selection box around the text, indicating it has now become a separate element that can be edited individually from the graphic.
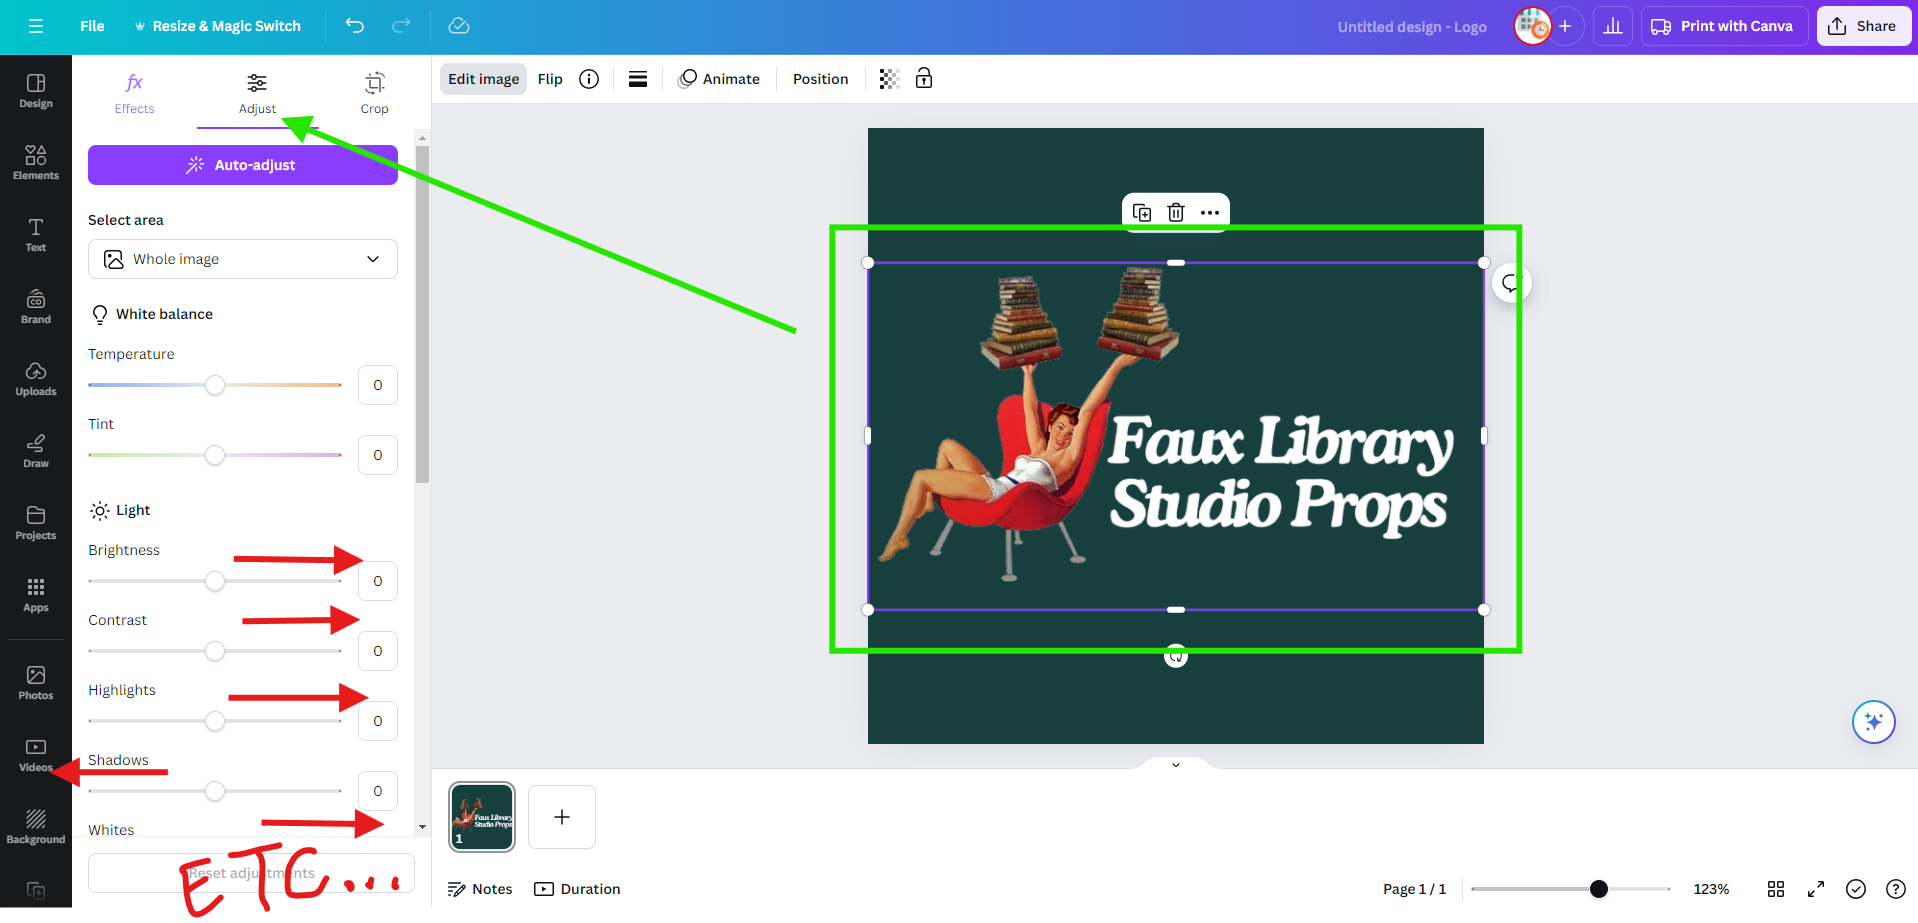
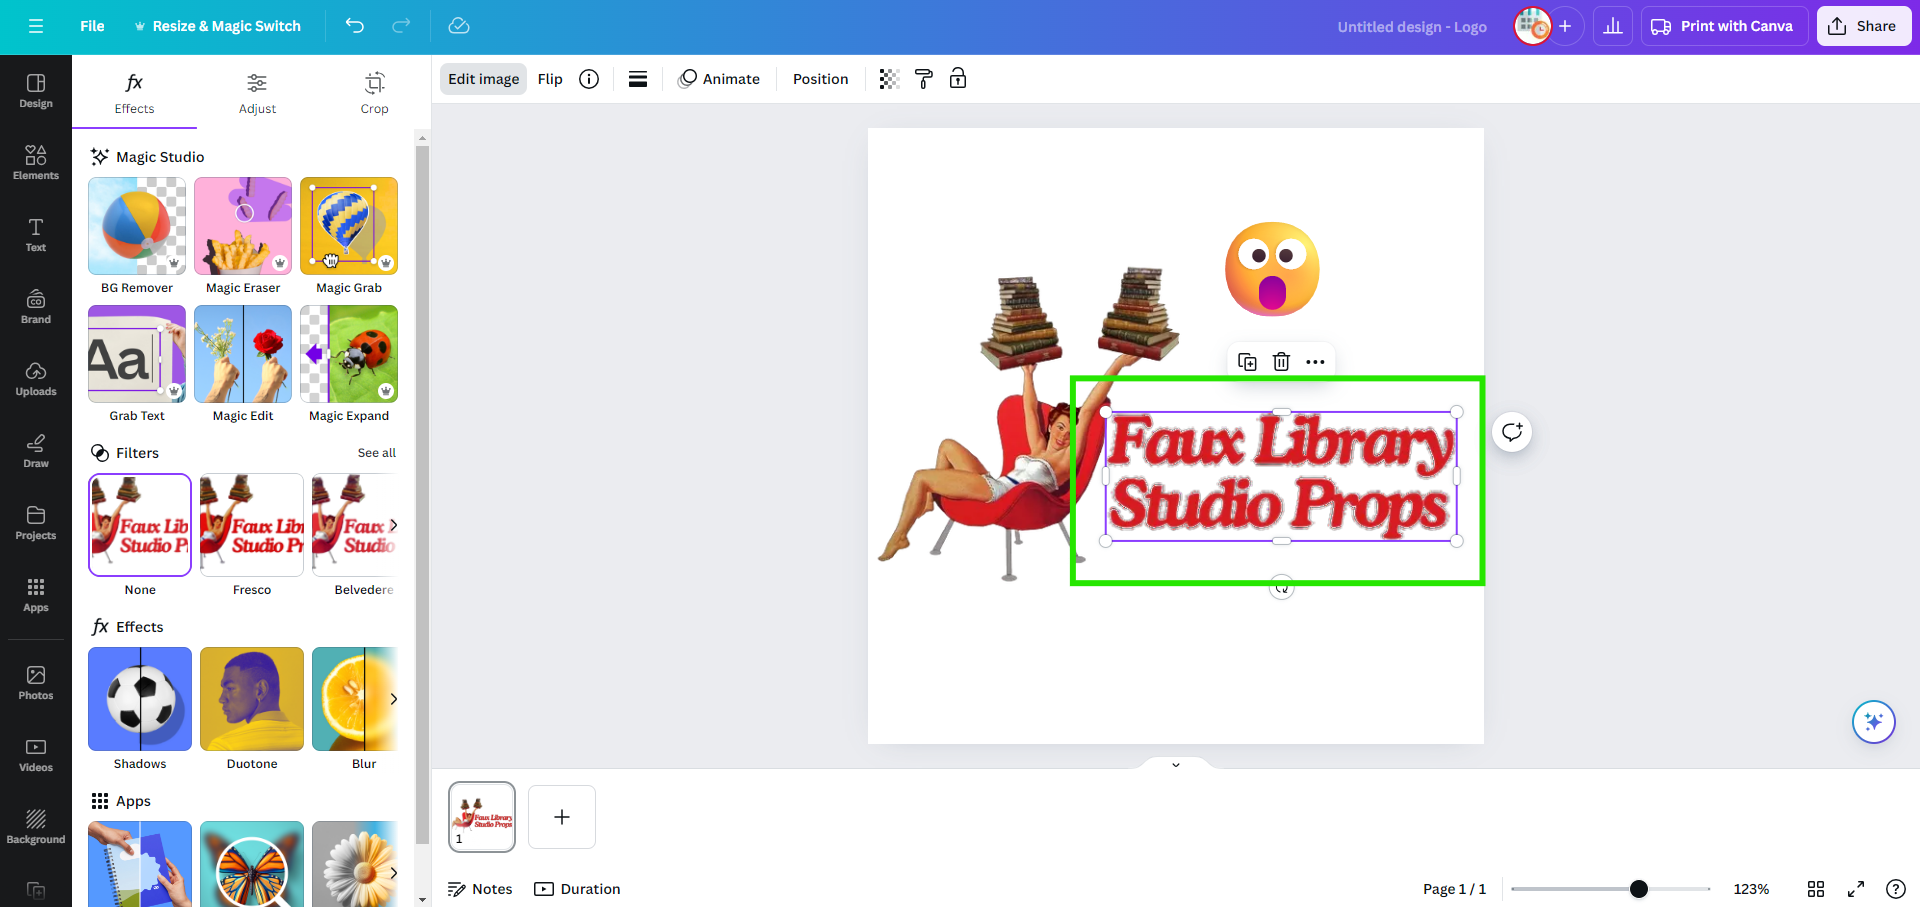
5. To make the selected text from the logo white, click on "Edit Image" again to access the menu, and this time select "Adjust" from the top. Make the same adjustments as you would when creating a fully white logo, increasing whites and brightness, etc., and removing blacks, shadows, and any saturation. When you are done, make the canvas background a darker color to check if your text looks good and legible. If your edit passes the test, congratulations! See the final result below:

You can also use the "Grab" tool, to varying degrees of effectiveness, to completely remove elements from photos or graphics, as demonstrated below. Have fun playing around with Canva's newest AI features, and reach out if you discover a helpful trick or tool to share!


